Wednesday, September 18, 2013

Trench warfare

The utilities (electric, gas, fiber optic) all come into the shop as that was the first building to go up.  We obviously have to get these run to the house.  The well is over by the house.  I also need water out to the shop.  So we needed a trench.  With a water pipe, we needed to make it deep enough to prevent freezing, so it was dug 6' deep to start, and the water line was laid in as we went.  That runs under the house footing, along with 2 electrical conduits we put in before backfilling the foundation.  So the water line is 6' down and the excavator rolled the pipe out (plastic) and then backfilled over it ~2 feet as he went.  Then the conduits for electrical and low voltage wires went in with a little backfill, followed by the gas pipe.

This was a brutal weekend.  The first point is the distance.  It is ~320' from end to end.  Then the electric service wire is huge and heavy and very inflexible.  It was a 2-man job to get the wire in the conduit, which was also massive 3" stuff (and also heavy).  This was exhausting work, but it is finally done and the trench filled back in.

Here is the trench with the water line already buried and ready for conduit.

Unrolling the massive electric service wire.  400 lbs worth on the spool! Tractor to the rescue.

 Unrolling it along the driveway
 Fully unspooled and ready to lift into the trench

Overview fro the shop with the conduit complete.  It's a looong way to the house! Power is the large one on the left, low voltage the smaller one on the right.

 Looking reversed towards the shop
 Where the conduits and water pipe go under the house foundation.  You can see the blue water pipe poking out at the bottom.
 Where they end at the shop.  I need to get them connected to the main meter panel soon.

Now it's all covered up and waiting for a more final grade.  No pics of that right now.  That's all for now, and brings everything up to date!


Drywalling the shop

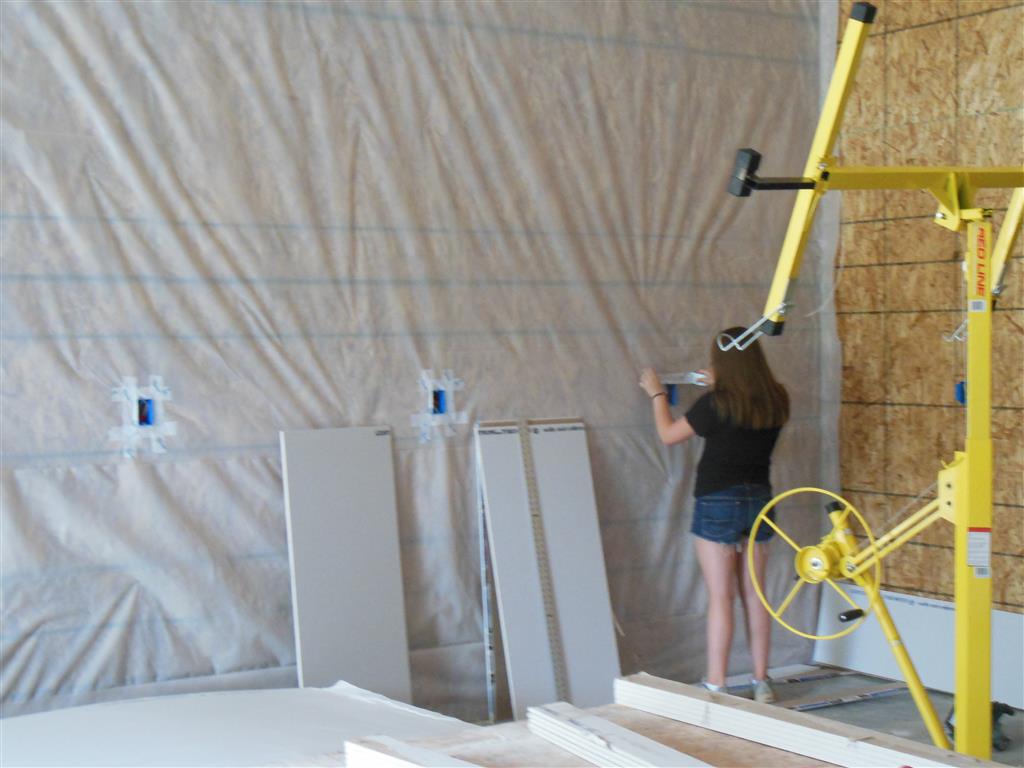
It took a couple weeks to get Sheetrock up.  I did most of the ceiling solo, and had help from my friend Brook for the walls.  I used a drywall lift for the ceiling, and the newer "lightweight" drywall made this a lot easier to do.  I don't think I could lift 12' sheet of regular drywall onto the lift, but the lightweight stuff was manageable (but still heavy).  The ceiling took close to 2 weeks, but like I said it was mostly solo.  Thee walls we did in 2.5 days.  It was a lot of work, but we had a good system.  We ran seams vertical as the SIPs panels don't need the extra stiffness form running them horizontal like typical framed construction.  This made it a little challenging to get them into place, but we made a simple frame from 2x4s to support them as we tilted them up.  Would have been impossible solo, but worked well with 2 guys.

Here was putting up the plastic vapor barrier before Sheetrock.  My friend tom helped with this. He's tall.  That helped a lot :-)

Here's my highly skilled helper taping off electrical boxes to the vapor barrier

Not a ton of pics of the drywall job.  It's drywall, you know what it looks like... These are near the end.

 Then I hired out the taping and mudding.  Sometimes, I actually do know where my limits are, and this is one.  I am lousy at it, and it would have taken forever to do it, so I got a guy that Brook had used previously with great reviews on Angie's list to do it.  It took him about a week to wrap it up.  I can only imagine how long it would have taken me...  He wrapped up last weekend 9-14-13.
Now I'm wrapping up final interior details and masking to get ready to paint this weekend.  Then I can get lights up and FINALLY be able to use it without having to keep it all cleared out all the time to allow this work to proceed...

House framing - lower level

Lower level interior framing for bearing walls started late Aug as we were waiting for the wall SIPs panels to show up.  They have been running behind a lot, but they finally showed up just after Labor Day.  This was only a partial shipment that included the lower level panels, but that helped keep things moving.

The interior walls done and waiting for SIPs to show up...


What's that in the distance?  Looks like a SIPs panel!


It is!  That is the stairwell wall.  Due to the large windows in the stairwell, they wanted to frame it with continuous posts from ground to top, so the whole 28' tall section was raised in one piece.  The framer (Roger) said it was a lot of fun...  You can see the lower SIPs walls almost done here.


And the next day they were completed with the garage door wall, and they got the steel beams in place.
 Another view.
No pictures of the floor trusses going up, but that was next.  It was pretty quick.

Then, while waiting for the main level SIPs to show up, they framed up the screen porch/deck floor, and then laid the floor sheathing out.  This was Sept 12, 2013. 

They did a little more interior framing but were basically waiting for the upper level panels to show up at this point.  They finally arrived on Tues Sept 16, so main level framing is underway.  I'll post some updates on that in a few days. Next up is some work on the shop and the trench for utilities.

Friday, August 30, 2013

House foundation

Next up was getting the foundation poured.  The plan is essentially half walk-out, half foundation, so there was one main wall section and then the other half was all frost footings (4' below grade).  We start with footings.  Here are the footing forms.  We used Form-a-drain forms for the foundation wall so that the footing drains would be built right into the footings.  I like this system.  The frost walls don't require this, so they just formed them with 2x8's.  The gray stuff is the Form-a-drain.  It is an extruded box tube with slots on the outside to let any water drain in so it can be piped or pumped away.


Pouring the footings with the concrete pump truck

They cut a keyway into the footings to help stabilize the bottom of the foundation walls (so it ties into the footing better.

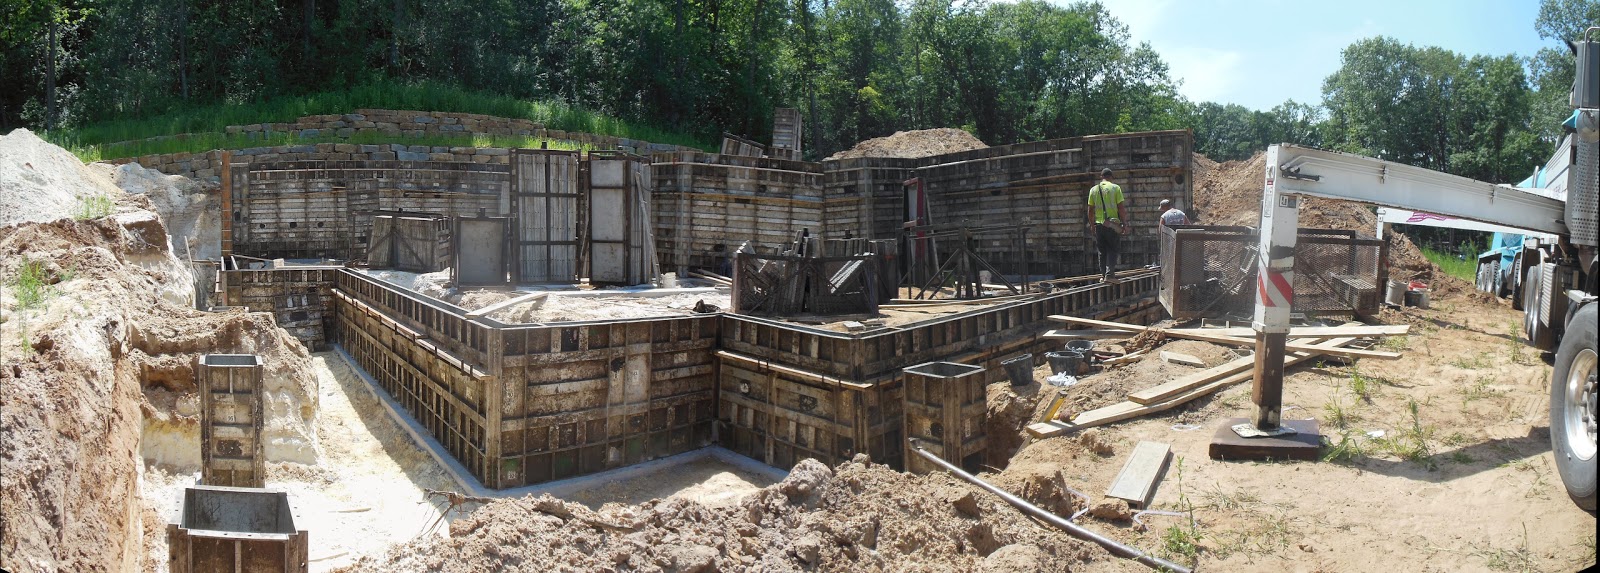
Then it is foundation time.  We are doing poured walls, so the form trucks showed up over a few days and kept coming (or so it seemed).

 All formed up and pouring the walls


And the final result with the walls braces installed (so they can backfill at least partially before everything is complete.)  These are panorama shots, so they will be a lot easier to see if you click on them.


Saturday, August 24, 2013

House excavation

I've been spending most of my time on the shop so far.  The plan has been to get the shop up first as it is simpler and then I have space to work to help move the house along, so the house has been running second banana so far...but it's time has come!  Everything has been delayed (story of all projects), but I was able to get things scheduled for excavation and foundation in Mid-late July.  Here are some shots of the excavation going on.

This view is from the higher ground looking down into the hole.  We used a laser to carefully measure and set out the pad height and then had the excavator dig to make a flat pad at that level. 

After that, since some of the walls are walkouts, there need to be "frost footings" or basically 4' walls that are set below the frost depth for the walkout sections.  Below is dugout for those after the pad was flattened out to the correct level


And here is the hole all completed nd ready for the concrete guys.

Thursday, August 15, 2013

Shop build - SIPs walls and other framing

As previously stated we are using SIPs for the walls.  These are prefab panels that are made with a skin of OSB on either side of a block of foam, all glued together.  It is actually a very strong structure (much more than regular framing) and is very airtight and highly insulated.  If you are curious to learn more, you can look here: http://www.sips.org/

I hired a local builder, Roger, who is very big into high efficiency houses and who uses SIPs all the time to handle the main framing work.  They started on July 8, and after Day 1 of getting set up and going they had this much of the walls raised:


After Day 3, they were done with outer walls :


Then they did roof trusses in 2 or 3 days:

And then, after laying down the roof sheathing too (no pic), I got a roofing crew to bang out the roof in a day:


I don't have any good pics of the final roof, but it came out nice.

Then we finally had a dry place to work inside!

Before the roof went on I installed the meter socket and main panel to try and get electrical service going, but the utility was long on promises and poor on delivering.  It took them 2 weeks for something they kept telling me "tomorrow" on.  The best part was when the crew finally showed up, barely worked, stood around gabbing half the day and had to come back the next day.  Then they sat in their trucks and took naps before starting on the second day!  What a work ethic...


Due to the distance from the road, they had to add a transformer close to the shop (when they finally showed up and did something...)

I also had Roger do the soffit and fascia and Tyvek, as those jobs really take more than one person to do reasonably.  Here is the soffit color - a dark maroon called Brandywine.


And you can see the waterproofing on the uphill wall that will be slightly buried with dirt, once backfilling is complete.  The structure was designed for this.

No pictures of electric work that I did (not much to see of it either), but here is putting up the vapor barrier prior to starting drywall (this was just last weekend -  Aug 11 2013)


And the garage doors just got installed today too (8/15/13)

Drywall will be starting on the shop this weekend, and the house is starting to progress also, which I will cover separately.  More to come on the shop as it progresses over the next few weeks too.