Saturday, May 31, 2014

Drywall

Drywall is still underway.  As of this writing (5/31/14) all the rock has been hung and the taper is well into taping and mudding.  He has about a week left, he thinks.  He has been at it for 4 weeks already.  We had done some of the ceiling drywall ourselves, as previously noted.  Mostly where the insulators needed to foam and blow in ceilings.  Other than that, I let Den (the drywall guy) do the rest of it.  I am OK with hanging drywall, but I sure wouldn't do the mudding/taping.  I hung all the rock in the shop, so this wouldn't scare me off that much except I just don't have the time with all the other things that needed addressing.  Plus Den works at a very reasonable rate, so that helps make the call to sub it out easier.

So some sequential progress pics.  I haven't taken a lot of the mudding process as it just doesn't look like all that much in photos.  I'll get a couple final shots of that.

Day 1, he started with upstairs walls.  Ceilings were already done by us, as noted.

Library:
 Bella's BR:

 Day 2 he wrapped up most of the upstairs, except the stairwell:
 Plus he completed the office on the main floor:
 Day 3 he worked on the main level mostly.  Hallway in the master suite:
 Master BR:
 Day 4 continued in the master suite.  Laundry room into closet:
 And he did the Upper stairwell.  Not sure how he handled those sheets as that is a tough place to work:
 Day 5 he is wrapping up the master suite.  Master bath here.  The little room at the back of the photo is the shower which will get tiled, so no drywall in there:
 Master bath looking out:
 And he started on the Foyer ceiling in the main level:
 Day 6 - wrapped up the foyer:
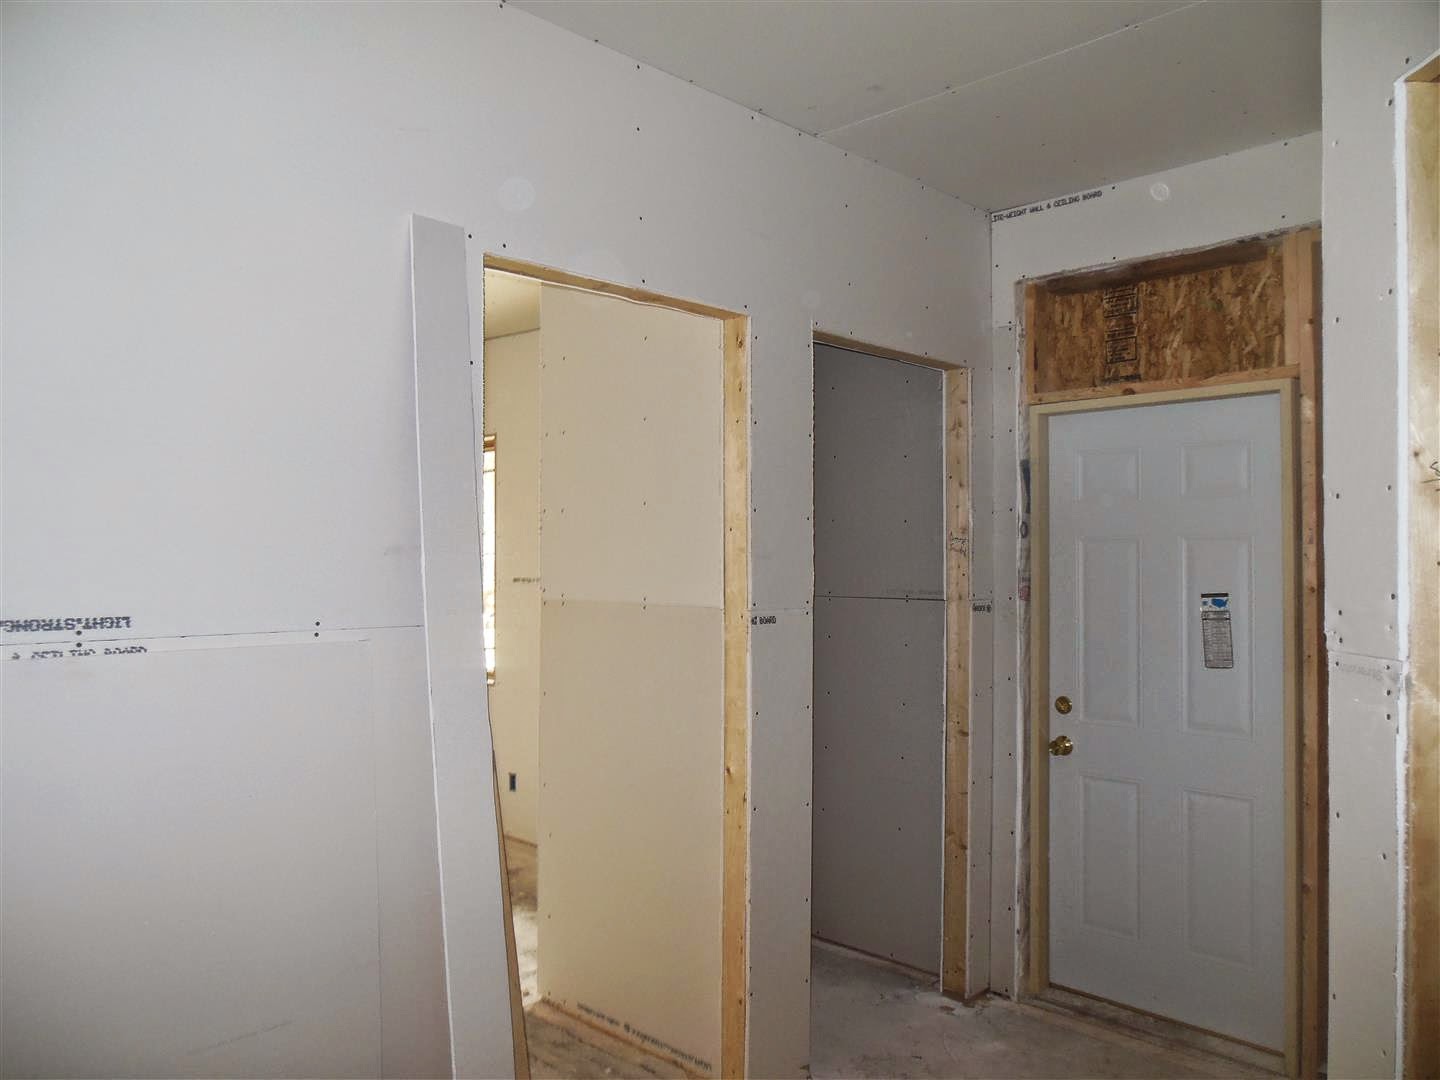
 And the inside walls of the pantry:
 More foyer (Still with the temporary front door):
 And he started a bit on lower level ceilings:
 Day 7 - Garage ceilings were basically wrapped up in one day, except for the soffits enclosing the steel beams:

 Day 8, he moved back to the main level and did basically all of the great room ceiling:


I took a few more photos, but nothing real dramatic (drywall does not lend itself to drama...), but he finished off the rest over the next few days, and then started taping a little bit the Friday before Memorial Day (5/23/14).  He has been taping all week after Mem day, and will continue for all or most of next week.  I'll post another entry with the final pics of that.

After he wraps up taping, we still need to finish off the subfloor.  On top of the concrete on the main level, we need to put down another layer of subfloor so there is something to nail the wood floor to (or carpet, or tile...depending on the room). That will take a few days.  Then it is time to plastic off all the windows and then blast a coat of primer and some white paint on the ceilings with the sprayer.  We might do some finish painting then too, but that will depend on a lot of things (choosing colors, timing, etc).

Wednesday, May 28, 2014

Wrapping up radiant tubing

Here are some final shot of the radiant tubing on the main level.  Here is the shot with all the sleepers completed.  This was a a lot of messing around to get here.  The wood sleepers are for screwing down the subfloor, and also to keep the concrete nice and level.

Great room:


Master bathroom was a bit of a contortionist pattern:


Then I got a crew of guys to do the pour as a side job.  Went very well.  A nice bunch of guys with a great sense of humor.


Great room progression:


Master suite and office:

After they left and the concrete set up a bit I took a flooring scraper and scraped off the tops of all the sleepers so they were nice and flat and clear for screwing down subfloor.  That was very tiring, but had to be done quickly before the concrete set up too much.  No pics of that, just making a mess..

At this point all the rough mechanicals are done and it is basically time for drywall.

Insulation

I talked a bit about insulation in the last post.  This was a great milestone to hit as it now means the house can be somewhat livable to work in.  Only too bad it didn't happen in November before it was 150 below zero for 3 months!

The ceilings in the house are divided into two types: the cathedral great room and the truss framed roofs in the other sections (Master suite wing and upper level).  These are handled differently for insulation.  The great room gets 4" of closed cell foam sprayed directly on the underside of the roof deck, and then the remaining 10" of space are filled with dense pack cellulose giving the roof assembly something on the order of R-60.  It is important to seal a cathedral ceiling like this with spray foam to avoid moisture/condensation problems in the future.  This is the reason for spraying the closed cell foam first.  The dense pack is to gain extra insulation at lower cost.  If you want the building science details behind it, drop me a line.  Otherwise everyone's eyes are probably glazed over by now as it is...

Here are some shots of the great room insulation in process.  The first shot you can see the one side of the Big Beam is done with foam, and the other side was started.  This was the end of day 1 which included a lot of prep and setup time.


Here both sides are done foaming and they have put up netting on the first side that was already done with foam.  This netting is air permeable so when they blow the cellulose in, the air that is used to blow it can come out through the netting to allow the cellulose to settle fully in.
 Here you can see the netting is all complete, and they have finished blowing in cellulose.  The holes near the ridge beams are where they stuck the hose in to fill it up.  If there was an obstruction, they poked in another hole to finish it off.  I placed speaker boxes in the ceilings for future speakers for a general sound system or possibly for surround sound in the TV area.  I just made these boxes out of some sheet foam.


They also foamed in under all floors to help the radiant heat go the direction it is supposed to (up).  One thing that also had to happen was the duct work that was in the garage space needed to be foamed in with closed cell first to seal it in.  This is the first picture. Note the ducts covered in foam above the red steel beam.


 Then since the tuck under garage is considered unconditioned space, they foamed in 10" of the open cell foam for an R50 floor in the great room (directly over the garage).  The open cell is really wild to watch them place it as it expands an incredible amount - a lot more than the closed cell.  In the first pic you can see the main trunk duct below the trusses at the very bottom of the pic that was already sealed with closed cell.  That was later enclosed in a soffit.

There was a whole lotta foam going on for a few days...

As for the Truss ceilings, the original plan was to just blow in cellulose.  After talking with the insulation guys, and thinking it over, it made a lot of sense to first put down a seal coat of closed cell foam first on top of the ceiling drywall so everything would be totally air tight.  No sense making the rest of the house perfect and leaving this without a good seal.  So they did that first.  But there was a wrinkle.  I had been putting up plastic vapor barrier on the upper floor while they were working elsewhere in the house.  Once I got that done was when we discussed foaming it first.  And the guy told me the plastic was not very compatible with the foam so it was better to leave it out.  So after nicely covering the entire ceiling, I tore it all out.  I love tearing work out - NOT!  But it will be better in the long run and only wasted $50 of poly, so such is life...  Here it was before I tore it down.  Figured it was worth a pic at least...


More radiant tubing next

Saturday, April 12, 2014

More winter work

Here is some detail on the HVAC work (Heating Ventilation Air Conditioning).  Primary heating is through radiant water tubing in the floors.  This got complicated in several places.  We also put in a full forced-air furnace mainly for the AC, but it is also nice to use as heat at times.  Radiant is great for the winter, but it is slow response, as you have to heat a slab of concrete for example, before you really get heat out of it.  If the days or nights are just a little cool , as typically happens in the spring and fall, you might not want to run the radiant for just one or two nights but need a little heat.  A forced air furnace is great for this.

I will say upfront that I greatly underestimated the required time for ductwork.  I lucked out though in that I work with a guy who used to be an HVAC tech around the cities.  He has done the whole thing for me, and it has come out much better than it probably would have from a commercial outfit as we could discuss items as they came up, and at less than half the cost.  It took him a lot of time, but I had too much else to do in the same time and there is no way I could have done this too.  Plus not knowing some of the key details in how this is done would have hurt a lot.  He has a couple details he is finishing up this weekend (4/12/14) and we will wrap up final inspection on that early next week.  Then we move onto full drywall work.  All other inspections are complete for now (rough electric, rough plumbing, insulation, framing).

Here is the temp heat.  AKA The Dragon.  I took out a window and made a makeshift air vent to feed air to the dragon, plus a minor platform to hold the dragon.  It runs off natural gas, so I plumbed in the gas line to feed it (the large black hose).  You can see the gas regulator and valves in the second photo.  A temporary setup.  Now that it has finally warmed up this is not being used much at all, so it is probably time to give it back to the rental place.


You can see some of the main ductwork runs here, including after insulation.  Lots o' ducts.  They foamed under all floors as it fills in easy and helps keep the radiant heat going where it should.


We did a lot of foam insulation to seal things up well.  Here is a shot of the foam in the attics where they sprayed 2" of closed cell foam on the ceilings to seal everything up nicely.  They did a very nice job of this.  I was very impressed with the insulators overall- very good and professional.  This was a very tight space to work in so it was all the more impressive what they did.


Let's talk radiant...  The primary heat will be radiant heat.  In the basement we buried the tubing in the slab.  The main floor will be covered in detail below.  The upper floor was done with a technique called staple-up.  You basically staple the tubing to the bottom of the floor from below.  You use thin aluminum plates to help distribute the heat and hold the tubing up.  This is a hard way to do radiant but works OK for small areas, like the upper floor in this plan.  This was a full weekend of work for two of us.


Now for the main floor.  This one is a bit different as we are doing it on top of the main floor deck.  The techniques is to put the tubing down between 2x4 sleepers and the fill the space with concrete.  then you put a subfloor of plywood/etc on top of that to ready the place for the finished floor.  The house design was adjusted for this extra height.  We had to wait on this as a lot of other things had to be in place first, but we have now knocked out the main level in just a couple weekends.  Layout and the head scratching took some time, but once we figured out how we wanted to do it, it came together pretty quickly.


Here is the progression of the great room. 1st step - layout and figuring it all out. Nothing nailed down yet.
 Starting to layout tubing.
 A couple pictures of the completed great room.  I still need to do the intermediate sleepers in between the main ones shown, but that will happen this weekend.  Then we will be ready to pour concrete there some time soon - in the next couple days.


Part of getting insulation done was wrapping up drywall on those ceiling areas that needed to be insulated, so I'll show that next as that is all done.  The main drywall work will be starting in early May as I have hired a guy for that.  I have too many other things to do, so that one needed to get hired out.  I had planned to do more of the drywall but there just isn't enough time.

The Winter of Our Discontent

For those of you in the upper Midwest, you know how bad this winter has been, but frankly it is off-the-charts-insane.  This has been, by far, the worst winter I have ever seen - in Western NY growing up, or here, in the 22 yrs I have lived here.  We have had more below zero days than anytime since the 1800's, and who knows how accurate those records really are?  And then snow storm after storm dropped inches upon inches of fluffy, white Global Warming on us.  And since we have had only about 3 days above freezing since Dec 1, it has all stuck around, all winter.  Below zero in March is basically unheard of, but here we are. Unreal.

What better time to build a house?

When November started turning into crap weather my friend Brook convinced me to get a temporary construction heater set up.  I got that set up the day before Thanksgiving, and it was already way colder than normal.  Come Dec ~4, it turned nasty and has not let up all winter.   This is pretty much unprecedented in anyone's lifetime that is living now.  Every winter has ups and downs, so we always get some melting in there and some big snow, but apparently Mother Nature has it in for me.  We started this project with a crappy spring and summer in 2013, and the winter of 2014 will go down in the record books.  I really just can't win with the weather.  So I soldier on.

I had been hoping to move into insulation before it got too cold this winter, but the delays over the summer were too much, all the work took too long, and the weather turned too bad, too early, so we could not get to spraying foam at that point.  And since it has stayed ridiculously cold for so long, plus the weather making all my work harder, we have not been able to get there yet...until now.  Foam is now scheduled for the end of March. But Spring is breaking out (I think) and we are getting there.  It has now turned a bit of Spring and the weather is warming dramatically (and suddenly...but then going back to Jan-Feb temps a lot too...can't win).  But still, this is a very welcome sign that I was not too confident would happen this year...

Enough about the crappy weather...  The time from  Thanksgiving until early March was taken up with utilities work, for the most part.   We also spent some time in  late Jan early Feb moving the tools and equipment from our current house into the new shop.  That is pretty well setup now, but I do not have dust collecting set up yet.  It will be a while until I can get that going.  On some of the worst cold days, I spent time getting the shop set up rather than freezing my butt off in the house.  I keep the construction heater set low when not there to save money, so it takes time to heat back up.  Hardly worth it for a couple hours in the evening when it is -15F out.

So here is a look at the electrical and the HVAC duct work. A lot of time went into all that.  I did all the electric and low voltage wiring, and a guy I know from work who used to be an HVAC tech did all the duct work and furnace install.  I can say for sure I underestimated how much time the duct work would take.  Were I to do that myself, I would not yet be up to the point of being ready for insulation.  It is good to have help.

So some pics of the mechanical work.  It takes a lot of time. Pulling a circuit may not seem like a big deal, but it takes at least 30-60 min, which adds up when you have 40-some circuits.

In mid -late Nov. I finally got the electric hooked up to the house.  Here is the distribution panel feeding off the meter for it.  This is  very silly way to do it given the circumstances and NEC code, but it is what the state and the inspector wanted...


A look at some of the early rough wiring in the house.   Another thing you see here is plastic over all the doors and windows.  Very early in the winter I was having huge frost issues on the woodwork of the windows and doors due to the stupid-cold temps so we had to cover them up to fix that.  It did work, and has some other benefits like protecting the windows from dirt and minor damage.  Plus we have to cover the walls with poly for vapor barrier at some point, so we did as much of that as we could at the same time.

Before the big wiring push you can see the main switch box array in the hallway.

Starting to get wires pulled in place.  Lots of labeling to keep it all straight...


 A look at the wires in the basement.
 And a look at the panel once it was fully finished.  I figure it is good to have someone look at it since the dingbat inspector never even took the smallest peek at it.  What kind of an electrical inspection doesn't even look at the main panel?  All he cared about was if I had an outlet within 6' of any corner or door.  Never looked at the main panel or any wiring methods.  This inspires confidence. ...NOT! And of course this is one of the main reasons I won't let anyone else wire my house. I know I will do it right, even if the inspector doesn't check anything...
 The big hallway switch array...before...
 And after....
 And "after" by the screen porch...
... And by the kitchen deck