Saturday, April 12, 2014

The Winter of Our Discontent

For those of you in the upper Midwest, you know how bad this winter has been, but frankly it is off-the-charts-insane.  This has been, by far, the worst winter I have ever seen - in Western NY growing up, or here, in the 22 yrs I have lived here.  We have had more below zero days than anytime since the 1800's, and who knows how accurate those records really are?  And then snow storm after storm dropped inches upon inches of fluffy, white Global Warming on us.  And since we have had only about 3 days above freezing since Dec 1, it has all stuck around, all winter.  Below zero in March is basically unheard of, but here we are. Unreal.

What better time to build a house?

When November started turning into crap weather my friend Brook convinced me to get a temporary construction heater set up.  I got that set up the day before Thanksgiving, and it was already way colder than normal.  Come Dec ~4, it turned nasty and has not let up all winter.   This is pretty much unprecedented in anyone's lifetime that is living now.  Every winter has ups and downs, so we always get some melting in there and some big snow, but apparently Mother Nature has it in for me.  We started this project with a crappy spring and summer in 2013, and the winter of 2014 will go down in the record books.  I really just can't win with the weather.  So I soldier on.

I had been hoping to move into insulation before it got too cold this winter, but the delays over the summer were too much, all the work took too long, and the weather turned too bad, too early, so we could not get to spraying foam at that point.  And since it has stayed ridiculously cold for so long, plus the weather making all my work harder, we have not been able to get there yet...until now.  Foam is now scheduled for the end of March. But Spring is breaking out (I think) and we are getting there.  It has now turned a bit of Spring and the weather is warming dramatically (and suddenly...but then going back to Jan-Feb temps a lot too...can't win).  But still, this is a very welcome sign that I was not too confident would happen this year...

Enough about the crappy weather...  The time from  Thanksgiving until early March was taken up with utilities work, for the most part.   We also spent some time in  late Jan early Feb moving the tools and equipment from our current house into the new shop.  That is pretty well setup now, but I do not have dust collecting set up yet.  It will be a while until I can get that going.  On some of the worst cold days, I spent time getting the shop set up rather than freezing my butt off in the house.  I keep the construction heater set low when not there to save money, so it takes time to heat back up.  Hardly worth it for a couple hours in the evening when it is -15F out.

So here is a look at the electrical and the HVAC duct work. A lot of time went into all that.  I did all the electric and low voltage wiring, and a guy I know from work who used to be an HVAC tech did all the duct work and furnace install.  I can say for sure I underestimated how much time the duct work would take.  Were I to do that myself, I would not yet be up to the point of being ready for insulation.  It is good to have help.

So some pics of the mechanical work.  It takes a lot of time. Pulling a circuit may not seem like a big deal, but it takes at least 30-60 min, which adds up when you have 40-some circuits.

In mid -late Nov. I finally got the electric hooked up to the house.  Here is the distribution panel feeding off the meter for it.  This is  very silly way to do it given the circumstances and NEC code, but it is what the state and the inspector wanted...


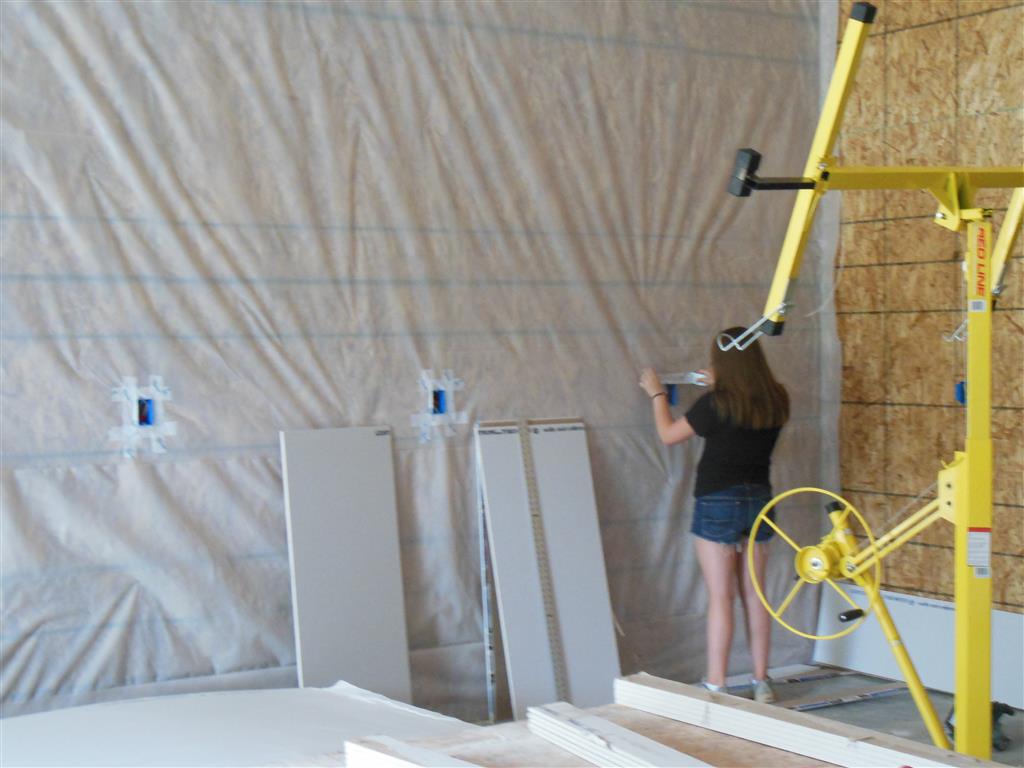
A look at some of the early rough wiring in the house.   Another thing you see here is plastic over all the doors and windows.  Very early in the winter I was having huge frost issues on the woodwork of the windows and doors due to the stupid-cold temps so we had to cover them up to fix that.  It did work, and has some other benefits like protecting the windows from dirt and minor damage.  Plus we have to cover the walls with poly for vapor barrier at some point, so we did as much of that as we could at the same time.

Before the big wiring push you can see the main switch box array in the hallway.

Starting to get wires pulled in place.  Lots of labeling to keep it all straight...


 A look at the wires in the basement.
 And a look at the panel once it was fully finished.  I figure it is good to have someone look at it since the dingbat inspector never even took the smallest peek at it.  What kind of an electrical inspection doesn't even look at the main panel?  All he cared about was if I had an outlet within 6' of any corner or door.  Never looked at the main panel or any wiring methods.  This inspires confidence. ...NOT! And of course this is one of the main reasons I won't let anyone else wire my house. I know I will do it right, even if the inspector doesn't check anything...
 The big hallway switch array...before...
 And after....
 And "after" by the screen porch...
... And by the kitchen deck


Saturday, November 30, 2013

The Great Window Panic of Aught-thirteen - aka Windows and doors install

This was another adventure.  The windows had arrived and the lumber yard was holding them.  We were all prepared to start putting them in the weekend before Halloween, but then my help vaporized and my wife's mother passed away.  She had been fighting cancer for years, so this was not a huge surprise, but nobody was expecting it to happen right then.  Along with dealing with that, the help I had lined up was not coming together right away, so we were put off for yet another week.

The delays were getting to be pretty worrisome at this point as the weather is rapidly getting colder and then I also found out that the telehandler (a construction site forklift) we had rented was due back the following Monday (Nov 4).  They had it rented out to someone else when we tried to extend it another week.  We had also heard that the windows were extremely heavy due to the size and the weight of the oak trim on them, so the lift was pretty critical.  So the windows were going in the first weekend of Nov, no matter what!  I was able to get one of the guys on the crew who was looking for extra work to help out also, my previously planned helpers re-materialized, and I took off some extra time from work, so we just needed some decent enough weather to push it through.

In the space of 3 days we managed to get 32 windows and doors installed, but not without a fight.  The larger windows were "mulled units" that were 3 individual windows fastened together at the factory to go in as a single unit.  The biggest ones of these were amazingly heavy - to the point where 2 men could barely lift them, and it took 3 or 4 to comfortably move them.  Without the lift platform, there would be no way to put these in.

There was an additional wrinkle.  The CAD software automatically generated the rough openings for the windows.  They were correct for all of the normal windows (using the Marvin specs), but for some reason were very wrong on the mulled units, and I never knew it (and the lumberyard never bothered to check anything - GRRRR).  The rough openings were the right height but they were all too wide by several inches to a foot.  We really didn't have a good option at this point, so we had to spend the time to re-frame the openings to fit.  Time we didn't need to spend at this point.

In the end it worked out OK, but was very stressful.  Too much writing and no pics?  Well here they are:


The front door will come later, but in the mean time I got a cheap scratch and dent door for the front entry, and we framed that in to get it enclosed (not shown above). Don't want to damage the nice front door during construction.  We put that in a few days after the windows were done.


From the inside, these are the biggest windows that we had to re-frame.  If you click on the images, and look closely, you can see the additional framing on the sides of each one.  Fortunately it did not seem to change the look or balance much at all.


Back side of the house.  That one 3 stories up was one of the more interesting ones to do, and again would not have been possible without the lift.


The garage doors were installed on Nov 15th, and you can see one last door into the garage that was also fighting me.  Another case of the rough opening being wrong, only this time too small, so it needed to be cut bigger - major pain!  And once again the lumberyard was no help.   You would hope for all the money you spend that these guys would have your back better, but I never felt like they did.  One of the downsides to not being "in the trade," I guess.  We re-framed that opening and got the door in just last weekend (Nov 24 - not shown).

But now we are fully enclosed and weather tight.

The scramble to get insulation in before it got too cold is a lost battle now, so I got temporary construction heat to keep the place from freezing up until we can get to that point, still hopefully soon, but there is a lot yet to do...

Interior framing is next.  Unfortunately that does not photograph very well, but you can get some idea from the pics.  That is wrapping up now.

Friday, November 29, 2013

Wrapping up house framing and major concrete work

Here is a lot of progress from late Sept into Oct.  Last day of framing was Oct 24, when the crew finally packed up and left.  I will admit, it was a bit daunting at first to not have them around anymore, but progress has been marching on since (future posts...)


 Here is the main framing complete from the front of the house.  The third window on the upper story was still covered by Tyvek in these photos.  Posts holding up the front porch roof are temporary as the footings were not in at this point.  That got taken care of during the basement floor pour (below).


As they were getting near the end of framing, I was working on slab insulation and getting the tubing in.  Got that wrapped up about Oct 15th.

This is the garage area, with the basement of the house in back.  Garage manifold first:


Here is the manifold for the basement with the sump basket next to it:


On Oct 18th, the concrete guys showed up to pour the basement.  We had a cold snap around then and it was getting down below freezing.  This is not good for concrete, but it still was not too bad at this point as it had just turned cold very recently.  Here is the basement slab pour.  They wheel barrowed everything from the garage doors back with just 2 guys doing that while 3-5 others were spreading, screeding, and working the slab.


Final view late in the day after they were all done finishing:

Being so cold, we stayed off it for a couple days, and then were still treading pretty lightly for a few more days.  Having the insulation underneath helped it cure better, no doubt, as the heat could not escape that direction.

Due to the temps turning cold, they also wanted to get the post footings in place right then too, so they did that.  They had a monster 24" auger on a bobcat and used that to drill the holes, and then fill them with the remaining concrete from the slab pour.  They had just enough to top off the footing forms.

A week after that, the framers finished up just before they left by moving the temp posts over to the footings.  They are still temp posts, but are now sitting on footings dug down to undisturbed ground ~8' deep, so they should hold well.  Next year I will get finished posts to finalize that.

We also had a deck over part of the garage (the kitchen deck) that needed a poured slab.  This required a lot of prep work including 2" of insulation, fiberboard underlayment and EPDM rubber roofing membrane to waterproof and insulate it.  The concrete company apparently thought they had me over a barrel and wanted over $10/sq ft to do this small slab (2-3x normal rates).  I first told them OK, in case I couldn't find another option, but then found a guy through a co-worker's relatives that was experienced and liked doing stuff like this on the side.  He did it, I bought the concrete, and saved over 60% over what the main concrete outfit wanted.  Now, I needed a big outfit to handle the walls and slab, as it took serious manpower and equipment for that, and I thought they were reasonable there and did a good job overall, but they were obviously sticking it to me on this little slab, so lesson learned.

Here is that 8'x24' deck poured on Nov 8.  Just in time before it got too cold.  I had to cover and insulate it the second night as it was getting into the low 20's and into the teens even, which was very cold for this early.  It would have helped if it stayed decent for another few days, but the weather has been messing with me all through this project, so why stop now?

Rebar and forms ready for the pour:

All done:

I've left it covered since then, as it has turned winter on us...

Next up is windows and doors, and interior framing.

Saturday, November 16, 2013

Wrapping up the shop (interior)

Finish work is always slower, but we kept plugging away at the shop into the fall and it's pretty well wrapped up now, except for exterior siding, which isn't going to happen until next year.  So here's a tour of that work.

First, drywall.  Here's the front portion (the garage) all sheetrocked and ready for taping.  We did the rock ourselves, but I won't even try taping on this scale as it is a skill that takes lots of time to learn, and I am not good at it. 

 And the rear portion (the shop)
 It is always good to have help.  Here my helper was taping electric boxes to the vapor barrier to seal them up.
The guy I hired to tape the shop took a bit over a week to do it all.  He worked alone too.  I couldn't have done it in a month or two, and it would have looked bad.  First coat here was all I got photos of.
 Then I painted it.  2 coats of basic white primer/paint.  I bought an airless sprayer for doing the house, so this was the first tryout of it.  It got quite a workout as this came to about 50 gallons of paint.
This is mid September, and getting it painted was a huge relief as it now allowed to start moving some things in.  I had to wrap up final electric by wiring in all the outlets and getting lights in place too, but that goes fairly easy for me, even if it does take time.  I did that over the next couple weeks and the lights arrived and we put those up.  High output T5 fluorescent lights I got from a local commercial shop that I found through my neighbor (friend of his).  They are great lights and were cheaper in the end than I could buy at Home Depot or elsewhere.  Good quality stuff - very impressed.  Here is a pic of the lighting and the tractor finally being able to be parked inside for the first time.


After that I turned my attention to getting the radiant floor heat going.  Here are two shots of the whole system.  The heater is just a tankless water heater on the wall to the left (beige box with the big yellow sticker with the stainless exhaust vent going up and out from it).  The heat/pump controls are on top in the middle (I hadn't wired them up when I took this), with the 2 pumps directly below them (1 for garage, 1 for shop).  The other equipment on the plywood to the right is the internet/phone service for the property.  All utilities come into the shop first, then get distributed from there.


Here is the system fully wired and during filling.  Since we don't have water going at the site yet, I just got a big 40 gal tub and filled it from buckets I brought from home.  I picked up a cheap submersible pump to do the job.  It took about 30 gal to fill the system but went pretty quick - a couple hours at most. This was right after I finished filling (Nov 10).  I just fired up the heat yesterday (Nov 15) after getting the final inspection sign off on it, so now...finally... I have a warm shop to work in.  I set it to mid 60's to start, and will see how it stabilizes over the next few days.


I have gotten bad at updates and taking photos lately as I have been way too busy.  The framers wrapped up the house a couple weeks back, and I have working like mad to get things enclosed and ready for insulation.  The project was delayed too much and now I am up against winter without insulation or heat completed in the house yet.  We're trying to get there, but the weather has not helped, and we are running out of time before winter.  Some of the foam insulation cannot be sprayed if it gets too cold so that is a big issue driving this.  There is only so fast you can go doing this part time...

So there will be more updates coming on the house, but I need time to make it happen, and am under the gun with winter approaching.  We'll get there, but it takes time... Pray for a late start to winter!

Late update:  And finally we have heat!  Nov 15th was a big day as a lot of things got finalized then - we got power fully connected to the house, the garage doors got installed, and we fired up the heat in the shop finally.  Yes, there were a few inspections that day to allow all this...

Here is the shop heat coming up to temp.  It took overnight to get warm, but it is nice now.

 Kind of a long way from here, ya think?


Sunday, October 6, 2013

More House framing - Getting closer!

The framers continued working on the remainder of the shell, which mainly included the roof sections.  The upper level and the MBR end were trussed and went pretty quick.  The great room and the attached porches/decks were a bit trickier than the trussed sections, so this is a bit slower going.

Here are a few shots of the roof framing work.  There is also a bunch of detail framing that never shows up in pictures:  Things like truss hold-downs and various hangers and brackets that take a good amount of time to install but are critical to the structure.  All that is going on in the background.

Upper level roof trusses 9-25-13


Upper level roof sheathing 9-26-13


Upper level roof and MBR roof sheathed 9-27-13

Great room I-joist rafters, West side 9-30-13

Great room I-joist rafters, Both sides, 9-30-13

Upper level and MBR wing roof waterproofed 10-2-13

Great room roof sheathed and waterproofed 10-3-13.  This was a big push by the crew.  They stayed late, basically until dark, to complete this as major rain was forecasted for that night and the next several days.  The weather did not disappoint as we got probably 3"+ of rain over that time.  We needed the rain, but it made a mess of the site, of course. The deck area needs to be completed on the front and the front entry.  These are the main areas of work coming up.
 Great room from the inside
That is pretty much everything on the house to get us up to date.  The framers expect to finish up main framing in the next week or so, and we can get a final roof on it within about 2 weeks.  Windows arrive around Oct 9 and will get installed as the weather and time permits over the next few weeks.  We are doing the windows, so after framing is done we are pretty much on our own, except for plumbing and a few other things.  I have a few more updates to post in the near future, but then it is going to slow down quite a bit as 1 guy in the evenings plus a friend or two on weekends, cannot get done anywhere near as much as an experienced crew working full days all week. Plus, finish work is always more time consuming than framing and rough work.

We are also now running into the problem of delays adding up and causing trouble as winter is rapidly approaching and it is going to be very hard to get the place weather-tight and insulated and HEATED in time.  If it isn't heated by early Dec, it will be a problem, and that is going to be very hard to do.

I will show a few things completed on the shop next.  That is in finish work stage which is much slower, as noted.