Tuesday, December 25, 2018

Deck railings and screen porch screens - Summer 2018

One of the remaining BIG projects was the deck railings and screens for the screen porch and the balcony.  My intent was to do this the summer of 2018, but with graduation for our daughter and getting her off to college, there has not been as much time for this as I had hoped, so I am quite behind.  As I start writing this (Oct 6) I have completed and installed the railings on the kitchen deck, and completed the railings for the screen porch, but have not run them through metal finishing yet.  And I am about to start on the railings for the Balcony.  The screens may have to wait until next spring at this point.

So let's get started

----------------

The first step was preparation.  I needed to get set up to weld these as the railings were all going to be TIG welded from 304 Stainless Steel (I never want to paint or re-finish anything EVER again).  I needed to get a welding table made and get the welder converted over to TIG welding capability.

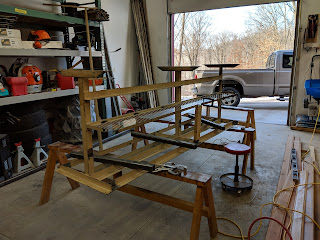
For the table, I started with a steel framed table I bought off a supplier of ours at work who was retiring (he was a one-man injection mold shop).  It was fairly lightweight so I needed to beef it up and get a good top on it.  Here it is flipped over after I had started modifying it:


Adding sturdier legs:

Basic frame done and added common truck receivers (for towing trailers, typically) for flexibility in mounting things like vises and extensions:

Went out and got the frame sandblasted and powder coated. Pretty!


You can see the vise in one receiver and the extensions on the far side of the table, making it wide enough to fit the railings:


So with that done I could start on the railings.  I started with the kitchen deck as it was the least complicated.  The frames are made from 1-1/2" angle stock (304 SS), and then the in-fill "prairie grass" is made from round rod stock ranging from 1/8" to 5/16" but the bulk of it is 1/4 and 3/16", also 304 SS.

Here is the first frame being test fitted:

And the beginning of filling in the "grass".  The curves are bent through the use of a basic 3-wheel roller, then the pieces are cut to final length to fit, as needed:

First panel almost complete:

First 2 panels installed after welding.  The wood railings were the temporary ones used to meet code for final inspection.  It will be nice to get rid of those finally!

After welding, the panels needed to be run through a finishing process called pickling and passivating to eliminate the discoloration and scale from welding and to ensure that the surface will not rust and is truly stainless.  That was done in a local metal finishing shop.  Once that was complete, they were installed for the final time:


On to the screen porch.  This is the big one, so it took a lot longer.  Here are shots of the railings after welding and initial installation, but they have not yet been pickled/passivated.  Since this is going to be screened in, the area below the main panel was sealed off with a piece of SS sheet metal, and small square standoffs were welded in to create a flat plane for the screens to sit in.


I still need to create the screen frames for the areas above the railing panels, and all the screens.  I started work on the railing panels for the balcony (which is fairly small) late in the fall.  Once that is done, I will have to decide if I continue to move on to the screens and screen frames, or if I move onto more important seasonal things, given that winter is fast approaching.

I got a quote for electropolishing from another metal finishing place in town that is a lot easier to work with.  It was a bit more money to do it over pickle & passivate, but I decided to go for it on the screen porch.  I am VERY glad I did as it came out much nicer.  So I am doing that on the balcony and may go back and have the kitchen deck panels electropolished next spring.  A couple pics of the elctropolished sections:


That's it for this project for 2018.  Next I'll be moving on inside for some doors over the winter, and probably doing the entertainment center in the later spring.
Friday, May 25, 2018

More kitchen details - Spring '18

With high school graduation coming up for our daughter, we wanted to get the kitchen as completed as possible.  With the work below, it is basically 100% done. A couple minor things left to do, but nothing real noticeable.

We are now right about 5 years after breaking ground (July).

The pendants.  These were 100% custom.  We had the shades made by a local glass blower and I made the fixtures from components.  With the sloped ceiling, we could not find a stock pendant that was sturdy enough.  The typical method for doing custom shades is to buy a stock fixture, toss the shade, and put the custom one on.  I made these from lamp parts bought online and some steel tubing.  I measured and cut each one based on the position of the electrical box on the ceiling, then had to tap threads for the lamp fittings.  Getting the lengths to end up even was the hardest part.

The setup I created to tap the threads in the tubes:

Test fitting the first ones:


Different length tubes ready for paint:

Raw fixtures installed:

And the shades.  Remember that you can click on the image for a larger one, and I highly recommend it here so you can see the shades.  They are beautiful.


The pantry door.  There is a door switch so the light goes on when you open it, and back off when you close it.  That is very handy for a pantry.  Here is the door itself:


And here is the door trimmed out plus the window over the sink trimmed out.  I needed to do that window as the next thing up was the backsplash tile

And speaking of backsplash tile....  It took a little over a week to get the backerboard up on the island, tile the island and wall counter backsplashes and grout it (plus sealing).

A couple in-progress photos:


And the complete job:


About the only remaining detail is capping off the top of the pantry door bump-out.  I just want a solid plywood shelf on top and some crown molding there to finish it off.  Not too major, and not real obvious even if I don't get it done before graduation.


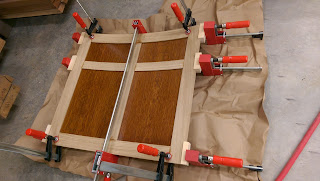
Friday, April 6, 2018

Wrapping up the kitchen finish work - Winter '17/'18

After wrapping up the master bath there were a bunch of trim tasks in the clean-up list to get done.  I still needed a panel to cover the front of the tub in the master bath, a panel for the side of the lower level bath vanity, and a few panels for sides and backs of the island cabinets.  Then I also had to finish trimming out the curved front of the island, make the curved drawer fronts and doors for the inside of the curved section of the island, and make the pantry door and do the backsplash tile on the island and main counter. Oh yeah - the toe kicks needed covers made from 1/4" plywood painted black too.

Panels on the backs and side panels of the island.


 Here is the trim on the curved front.
 Curved Drawers are in... doors next, but they are very complex!


Curved Doors:


And the remaining cover panels on the Master bath and the side of LL bath vanity:


Next up is the pantry door and trim, the kitchen sink window trim and the backsplash tile on the counter and the island.   Plus several other smaller trim details.